Administration

System administration is available from the Administration menu in the top bar.
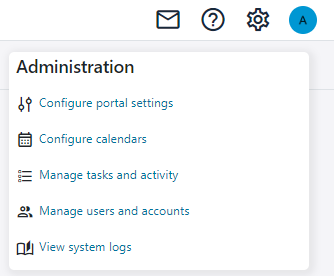
The options available on the Administration menu depends on what permissions you have.

Portal Settings

This page contains most settings for OmniFi Web. It is divided into several different sections.

System settings

SettingDescription
Enable Account ProtectionEnables account lockout on 5 consecutive failed login attempts within a sliding 5 min window. Locked accounts can be unlocked on the Users page)
Portal Log LevelSets the log level for the web portal.
Backend Log LevelSets the log level for the web backend service.
Task Log LevelSets the log level per task.
Remove files older than (days)Enables an automatic cleanup of old log files. The log record will be kept as reference, but the state is changed to β€œRemoved” and all related documents are deleted. Setting the value to β€œ0” will disable this function.

Execution settings

SettingDescription
Max concurrencyThe number of report execution that can run in parallel. Setting the value to β€œ0” will disable executions.
Task valid (days)The time a task is considered valid before clean-up occur.
Task timeout (hours)The maximum time a process can be running before it is considered failed.
Working DirectoryThis value can be left empty. If no value is set the OmniFi Reporting module installation directory will be used. The value can be set to change where reports are executed.
Task Retry CountThe number of times a task is retried before it is considered failed.
Temp DirectoryConfigures the location where temporary files are stored.

Email settings

SettingDescription
SMTP HostAddress to the mail server.
SMTP PortPort for the mail server.
User SSL connectionConnect to the server with SSL connection.
Authentication requiredThe mail server requires authentication.
SMTP UserUser for mail server authentication.
SMTP PasswordPassword for mail server authentication.
Send from addressThe sender for outgoing mails.
Default Email TemplateThe default content for the mail body. This will be used for mail layouts that do not have a mail template set.
Error Email TemplateThe content for the body in error mail.

Data Mart settings

SettingDescription
Connection stringThe connection string to the mart database. This is combined with the User and Password settings to form the final connection string.

Connections to the mart are made from the OmniFi Web Backend service, and the connection string needs to be configured with that in mind. If SSPI is used, the connection will be made with the account that the Web Backend service is executing under.
UserThe login user for the mart database.
PasswordThe login password for the mart database.
Command TimeoutConfigures the timeout for database operations in the ETL pipeline.

Branding settings

SettingDescription
Portal NameThe name of that site that is displayed on the login page and in the portal tag.
Portal ColorThe color of the portal tag and some elements on the Home page.
Show Portal TagEnables the portal tag.
MessageA text message shown to all users on the Home screen.
Branding LogoAdd a logo that is displayed at the top right corner of the web site.

Custom Variables

SettingDescription
KeyThe unique variable name.
ValueThe variable value

Export Repositories

SettingDescription
AliasThe repository name presented to the end-user.
PathThe root path of the export repository.

Calendars

This page is accessed from the Administration menu, and is used to configure calendar information.

Calendars are used by schedules to determine what days are holidays, weekend and business days, and configure weekend days and bank holidays respectively.

You can batch configure bank holidays by uploading a CSV file in the format yyyy-mm-dd,<Event Name>for example:

2023-01-01,New Year's Day
2023-04-07,Good Friday
2023-04-10,Easter Monday
2023-05-01,Labor Day
2023-12-25,Christmas Day
2023-12-26,Boxing Day

🚧

The Remove & Replace switch removes all bank holiday records and replaces them with the content of the uploaded file, so be careful with this function!

Executing Tasks

The Executing Tasks page shows running and queued jobs, e.g. report runs, email jobs Data Mart loads etc. It is accessible from the Administration menu.

From this page you can monitor task progress, and optionally cancel tasks. To cancel a task, click the Cancel button on the far right of the corresponding row, or select one or more tasks using the checkboxes on the left and clicking the Cancel Selected button in the toolbar. This will signal the task to stop and wait for it to finish. Cancelling the same task a second time (double-cancel) will force it to stop immediately.

The page updates in real time by default. If you want to study a long list of tasks in detail, you can stop the real-time updates by toggling the Enable Real-time button in the toolbar.

πŸ“˜

Please be aware that moder web browsers often put tabs in sleep state to conserve energy. In sleep state, the real-time messages aren't recieved. If you are switching to a tab that has been dormant for a while, you may need to click the Refresh button to get the latest state.

Users

The Users page lets you monitor and configure user accounts with information such as full name and email.

You can also unlock accounts that have been locked due to too many failed login attempts, using the padlock button on the far right of the corresponding row.

System Logs

The System Logs page displays logs from the local client application, the web server application and the web backend service, depending on your permissions.

The log displays the last 200 client log messages, the last 1000 web server log messages and the last 500 backend log messages.

πŸ“˜

The log level settings on the Settings page adjust the log levels run-time. To investigate an issue, you can adjust the log levels and reproduce the problem while monitoring the logs on the System Logs page.