Managing Reports
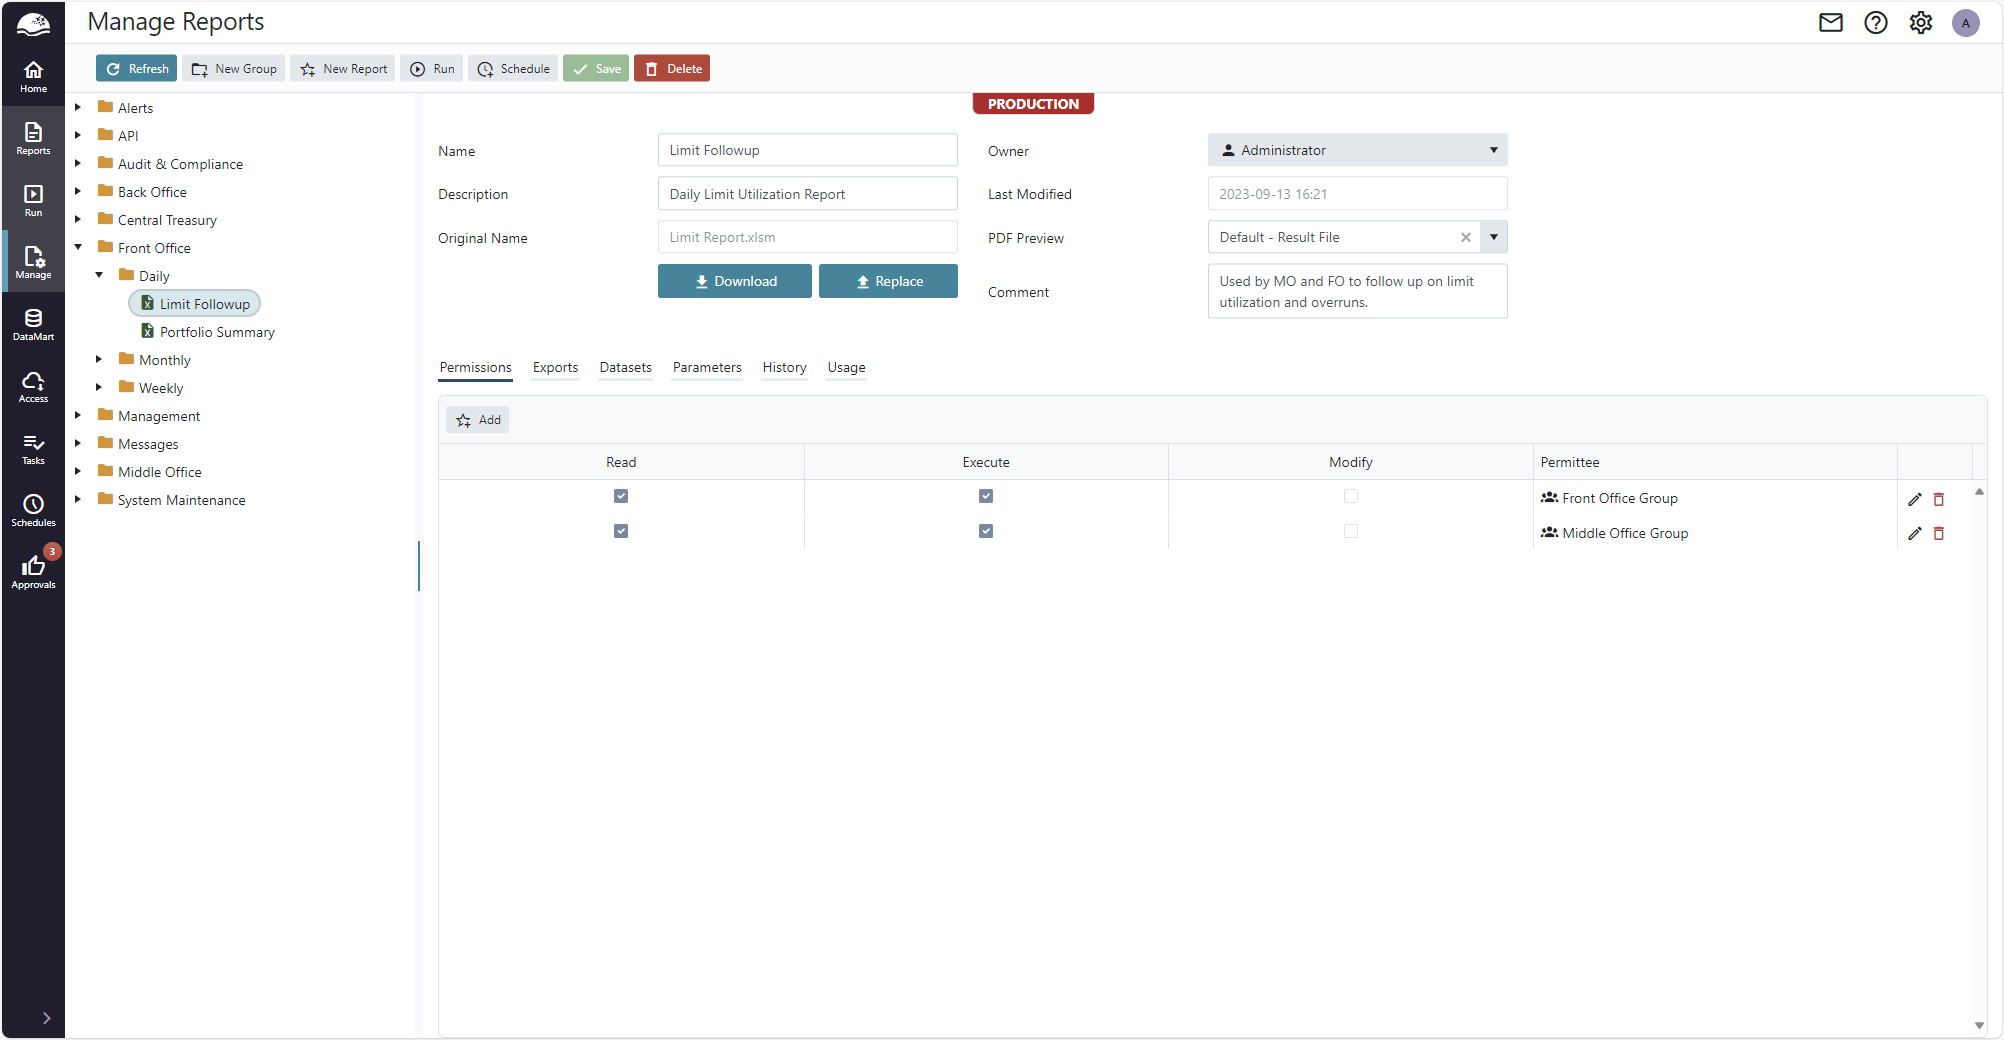
New reports are added from the Manage Reports page by pressing the New Report -button. The report can be added to the root folder or to the selected group. Existing reports can be moved by drag and drop.

After the report has been added, it can be configured on the details section.
Configuring Report
With a report selected in the report tree, it can be configured on the right-hand side.
Report Details
The report details section contains basic information regarding the report.

- Name: The visible name.
- Description: An optional field that can be used to add a short description for the report. The description will be visible in the Reports page.
- Original Name - The original name of the file uploaded.
- Owner - The user who owns the report.
- Last Modified - The date an time of the last modification of the report.
- Comment: An optional field that can be used add a longer comment for the report.
- Replace: Replace the existing report file with a new one.
- Download: Download the report file.
- PDF Preview: The file definition to show when previewing output in PDF format.
Permissions
In addition to being accessible to the owner, a report can also be published to others. To give other users access to the report and the result from its executions a new permission needs to be added. The permissions define the level of access and the group it applies to.

- Read: Gives access to the result from the reports executions.
- Execute: Gives access to executing and scheduling the report.
- Modify: Gives access to delete the report and modify all settings on the report details page.
- Permittee: The group for which the permission applies.
Exports
The Exports tab configures layouts and files that can be used when sending emails, exported to a repository or as report previews.
The Exports tab is divided into Layouts on the left and Files on the right. A layout can optionally be configured with a Mail Template, used used as email body when sending emails.
Each layout can have any number of files defined, used as attachments when sending emails, exported to a repository when the report runs, or used to preview the report result.
The default layout can be edited, and new layouts can be added in the mail layouts grid. The layout has the following configuration.

- Name: The name that is used to identify the layout.
- Mail Subject: The subject that will be used for the email.
- Mail Template: Displays the name of the template that is used for the email body. The template is uploaded by pressing on the layout row. How to create a mail template is described in section 5.5.
- Condition: Can be set to a cell reference that is used to determine if the mail should be sent or file exported to a repository. The value should be in the format <Sheet name>!<Cell name>. If the value is set, the mail will only be sent if the cell value is "TRUE".
Layouts fields such as the subject can be dynamic with the use of Variables. This allows you to include for example the report date in the mail subject.
See Variables & Functions for more information.
Mail Templates
The email body template is an HTML file without images. The template can be created using e.g. Word and saving as web page.
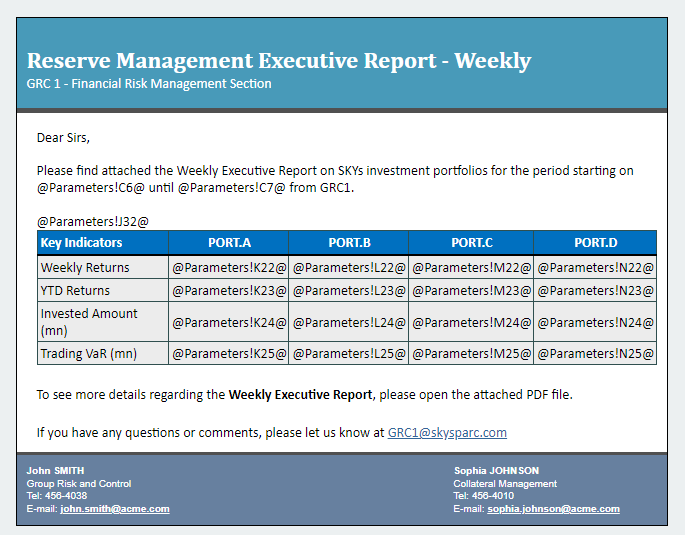
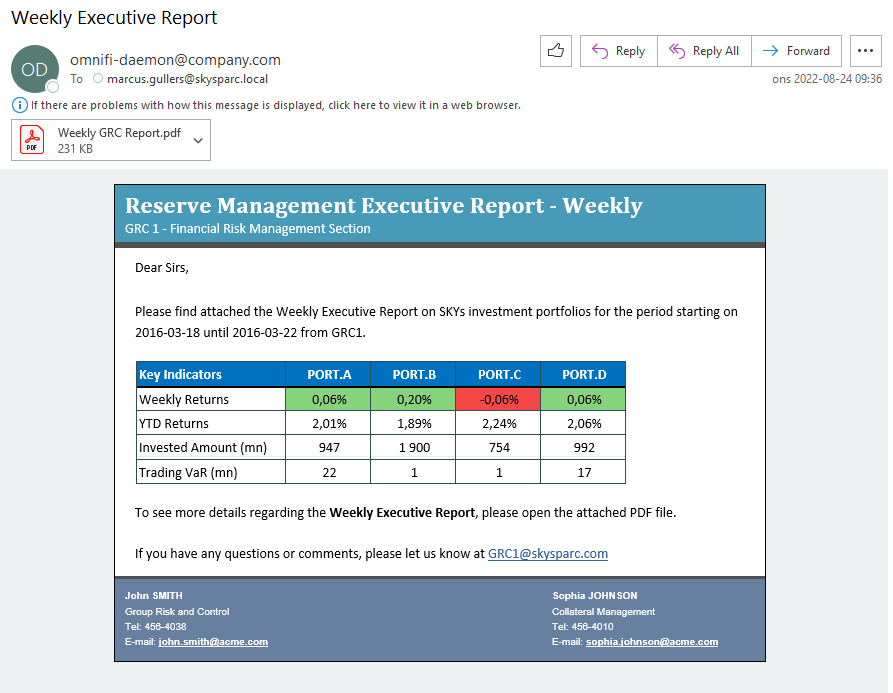
It is possible to have references to the result report in the template. This means that values will be fetched from the result report and populate the mail. The references should be in the form, @<Sheet name>!<Cell name>@.
In the example below, values from the sheet "Parameters" will populate the email dynamically dynamically. It's also possible to dynamically create tables and formatting common HTML functions.

Email Layout HTML

Received Email after execution with populated data
Report parameters can also be referenced from the layout. They are referenced by setting the quoted parameter name. For a parameter, Start Date, it would be @"Start Date"@.
It is also possible to include execution information from the task and log, available variables are listed in Variables & Functions.
Need help with HTML Layouts?We're always happy to help! Shoot us an email, and we'll try to make ourselves useful.
Files
Each layout can define a number of files. Files describe a portion of the finished report to be used with specific file type such as PDF or CSV.
By selecting a layout, the files grid will display related files.

- File Name: The name of the attachment file
- Sheets: The workbook sheets that should be included in the attachment. This can be a comma separated list or all to include all sheets.
- Type: The type of attachment, Excel Workbook, PDF or CSV.
- Column Separator: When the Type is CSV, this column can be used to configure the column separator used in the CSV file.
For CSV files, the precise portion of a workbook to use can alternatively be limited by creating a named range "csv" in Excel. If a range "csv" is found in the finished report, the Sheets field in the file definition is ignored.
File names, like mail subjects, can also be dynamic using variables.
See Variables & Functions for more information.
Updated 9 months ago