XRS Query
XRS query provides query access to XRS functions published on ION Bus.
Step 1: Select Query Type
Select the xRS Function query type from the list of data sources and optionally specify a name and output destination in the the top half of the Options page.
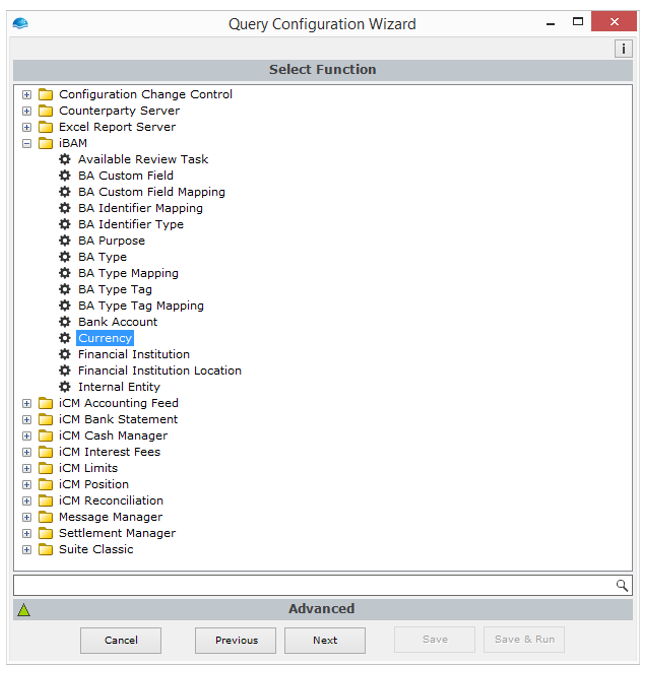
Step 2: Select xRS Function
Select one of the available XRS functions. Functions are grouped by publishing component.

Browsing xRS Functions
OnBehalf Functions
Some functions can be executed with OnBehalfOfToken. OnBehalf is recommended and enabled by default, but can be disabled from the advanced section.
Step 3: Select columns
Although XRS queries are very fast, fetching more data than necessary loads the underlying system. It is best practice to include only the minimum required columns in the query to minimize the system impact.
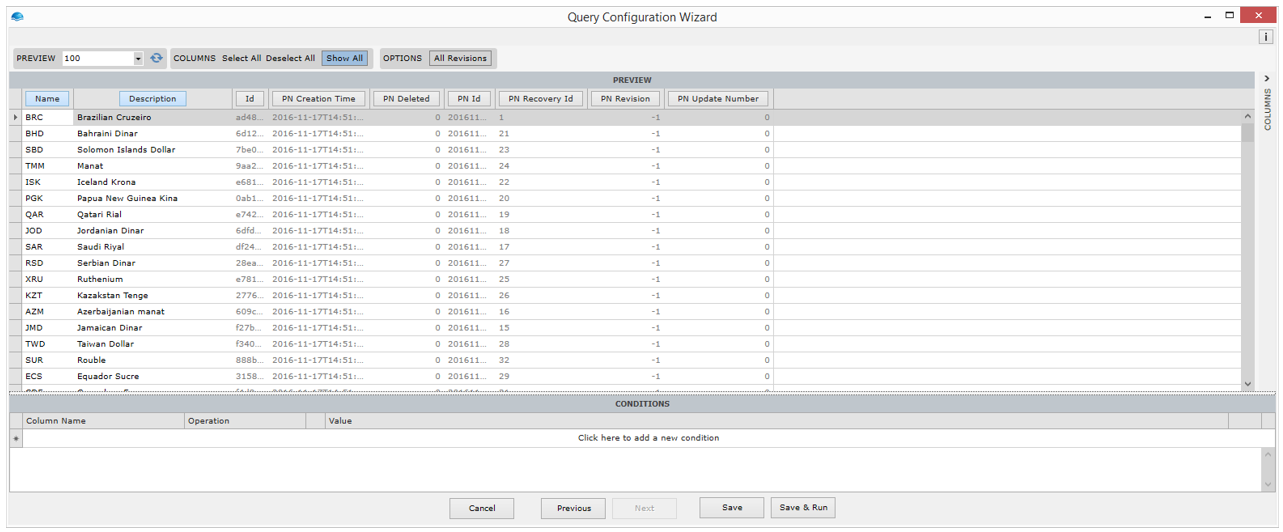
From the preview, select what fields to include in the query by clicking the column header buttons. Included columns are grouped to the left in the preview. If no column are explicitly included, all columns are included in the query.

Selecting xRS Function Output
- You can also use the Select All/Deselect All buttons to add/remove all columns.
- Deactivating the Show All option will hide excluded columns.
- Column can be ordered by drag-drop of column headers.
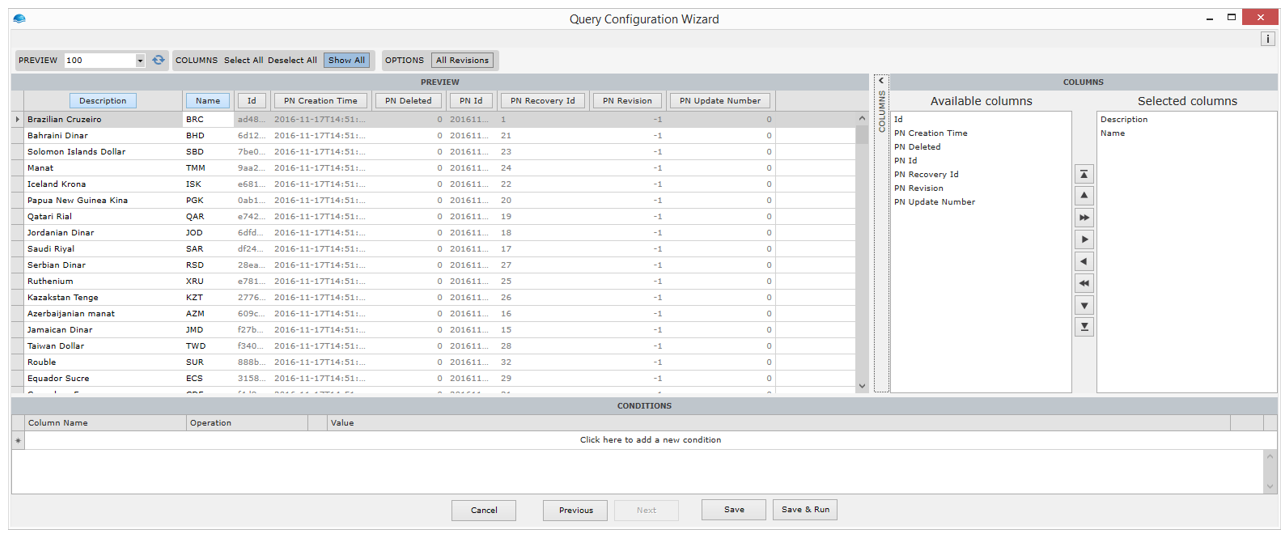
Column can also be configured using the Column chooser.

Expanded column chooser
Step 4: Configure filters
It is best practice to filter the query to a minimum of data already in the query stage to minimize the system impact.
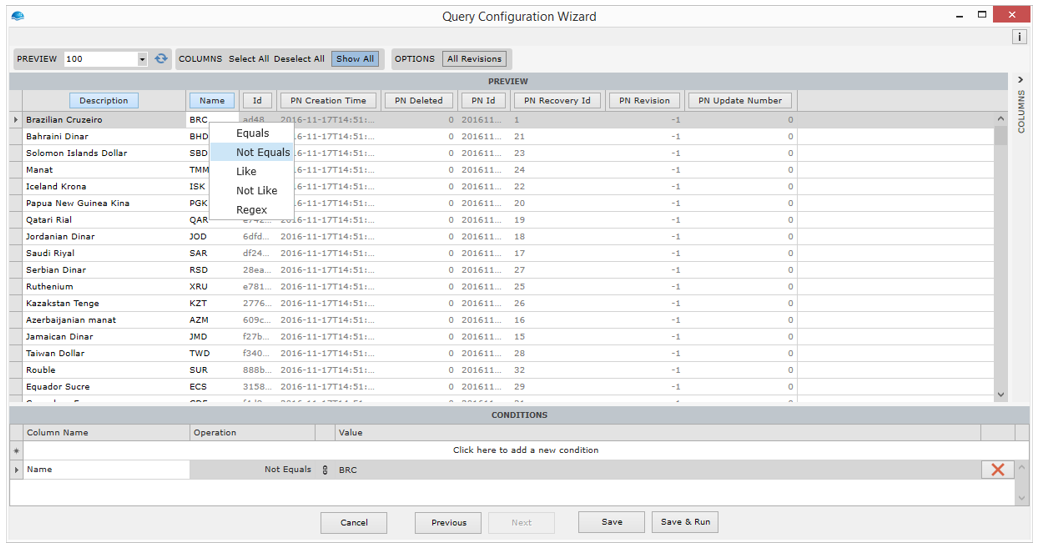
The easiest way to apply filters is to use sample values from the preview.
- Right-click a cell with the filter value, in the column you want to filter on.
- In the context menu, select the operator you want to apply.
- The filter is added to the Conditions table at the bottom of the screen.

Configuring a filter using sample values from the preview
You can also configure filter conditions directly, by clicking the area “Click here to add a new condition”.
To apply the modified filter click the refresh button in the preview section of the menu.
Step 5: Finalizing the Query
Choose Save to save the query without running it, or Save & Run to save and execute the query. If query output is defined then you will see your output in Excel.
Updated 9 months ago