Database (ODBC)
There are three ways to query databases through OmniFi:
| Query Type | Description |
|---|---|
| SQL ODBC | The SQL Option lets the user write and execute SQL statements directly from OmniFi. It supports all SQL functionality that the ODBC Driver exposes. |
| Query Builder | The Query Builder offers an easy-to-use, drag-and-drop interface, while continuously providing a preview sample of the query result. It can only query table and views and supports only SELECT functionality. |
| Query Module | Unlike the SQL query data source where SQL statements have to be formulated from scratch, this source uses preconfigured, editable, and parameterized SQL statements making it easier to use for those who are not as familiar with SQL. |
DSN
SQL queries require that a valid DSN (Data Source Name) is available for the user. During query creation, a DSN is selected from a list that is dependent on that the user has permissions to the specific database in OmniFi Administration and that the database is configured as a valid ODBC.
SQL
Step 1: Select Query Type
Select the SQL query type from the list of data sources and optionally specify a name and output destination in the the top half of the Options page.
Step 2: Select DSN & Statement
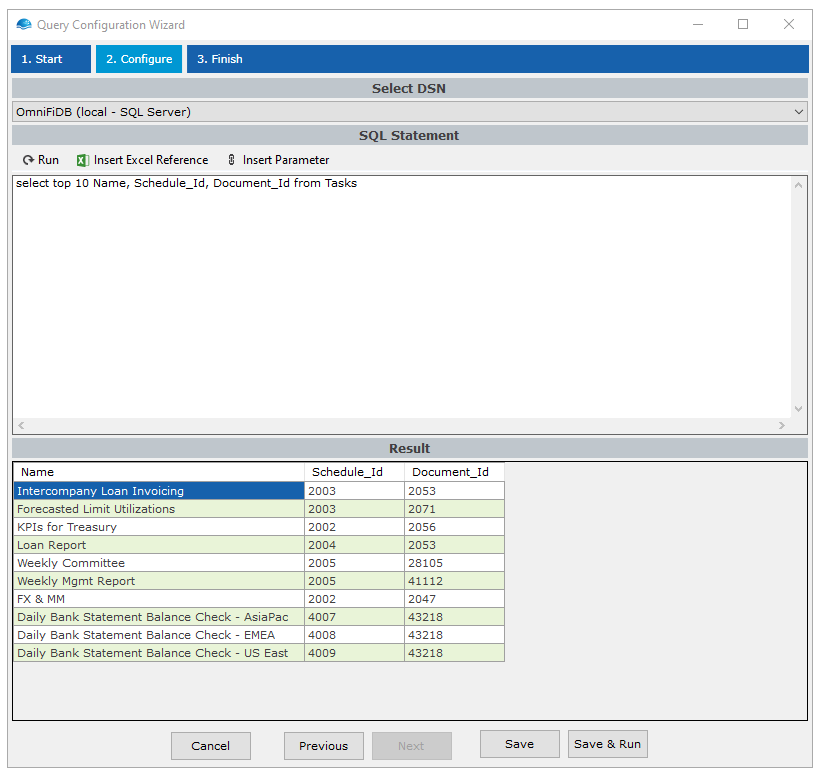
Select a DSN in the dropdown and then type in the SQL statement to be executed. Press Run (or F5) to preview the results.
Designing SQL Statements
Multiple SQL Statements
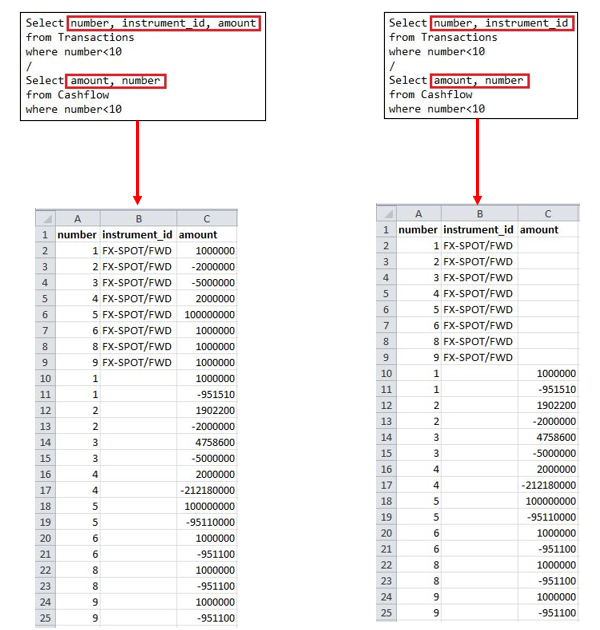
Certain databases such as Oracle do not allow multiple statements to be executed simultaneously. In this case, use a “/” to separate the statements as illustrated.
If there are multiple statements, the order of the columns in the result follows the order of the first statement. If other statements include more columns than the first, these columns will be added.
Parameters
SQL queries can be parameterized using OmniFi parameters by adding parameter references directly in the SQL text. Parameters provide input to the query run-time, and configuring the query with a few select parameters can make it much more flexible and reusable. You can add parameters manually by typing them in, or by using the Insert Parameter button.

Parameter references are encoded as the pattern {@[parameter_name]@}, where parameter_name is a unique name from the Parameter Manager, e.g. {@Id@}.
Simply introduce the parameter reference where applicable in the SQL text:
SELECT *
FROM dbo.Documents
WHERE Id = {@Id@}
The parameter reference is translated into a string before sending the query to the database server, which means you can use it to build up string literals in SQL:
SELECT *
FROM dbo.Documents
WHERE DisplayName like '{@Prefix@}%
Parameters that are not string parameters to begin with are also formatted to strings and inserted in place. The format of the parameter string value is dependent on the database platform used. In this case we are querying from the OmniFi Database, which is an SQL Server database. OmniFi manages to recognize this most cases from the name of the ODBC driver.
In case the driver doesn’t have one of the keywords ‘mssql’, ‘sql server’, ‘oracle’ or ‘sybase’ in it, the automatic detection will fail and you can use the DbVendor directive to hint the database platform instead.
DbVendor is a case-insensitive additional parameter on the form {@dbvendor=[vendor]@} that can be placed anywhere in the SQL text:
{@dbvendor=MSSQL@}
SELECT *
FROM dbo.Documents
WHERE DisplayName like '{@Prefix@}%'
Accepted values are MSSQL, ORACLE and SYBASE. Other DB vendors are not directly supported
Step 3: Finalizing the Query
Once satisfied with the preview, choose Save to save the query, or Save & Run to save and execute the query.
Query Builder
Step 1: Select Query Type
Select the Query Builder query type from the list of data sources and optionally specify a name and output destination in the the top half of the Options page.
Step 2: Select DSN and Database Type
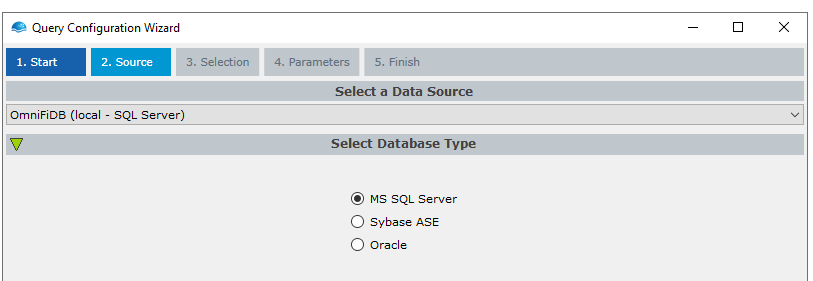
Choose which database to connect to by selecting a DSN.
The database type is preconfigured based on the database driver name. However, if the incorrect type is selected, this can be changed by click one of the radio buttons. Note that this section can be expanded or collapsed using the green arrow.
Step 3: Select Table/View to Query
After connecting to the database, OmniFi will show all database tables and views available. Select an item in the list and press Next to create the query.
Step 4: Configuring query criteria and output
In the next step you will define which columns that you want to query on and which criteria the query should have.
Selecting Columns
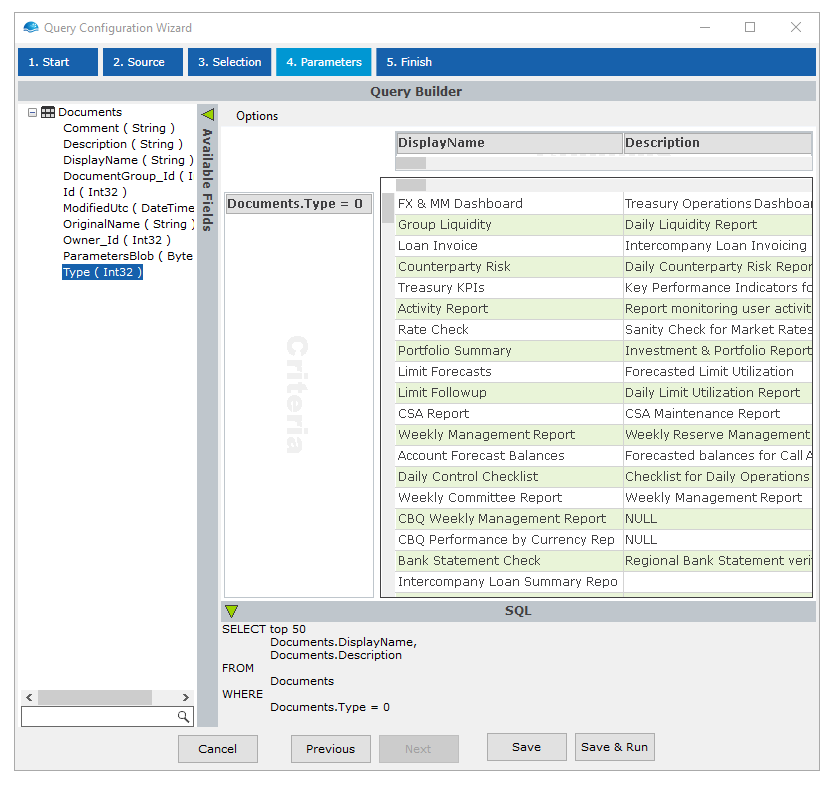
Choose the columns by dragging and droppings fields from the Available Fields section on the left to the columns section in the top of the preview area.
Configuring Query Criteria
When configuring a query criteria, double click on the field after dropping it in the Criteria box. This opens the Criteria Editor where an operator and a value can then be chosen. Note that values can have dropdown lists from which to choose. If not, simply type in the value.
Preview
The preview section gives a continuous feedback of the query configuration by giving a sample of the result.
SQL
The SQL section, which may be expanded or collapsed using the green arrow, shows the actual SQL statement that is being executed. The preview will always show the top 50 rows; but the final query executed will extract the entire data set.
Step 5: Finalizing the Query
Once satisfied with the preview, choose Save to save the query, or Save & Run to save and execute the query.
Query Module
Step 1: Select Query Type
Select the Query Module query type from the list of data sources and optionally specify a name and output destination in the the top half of the Options page.
Step 2: Select DSN & Statement
Query Modules are packaged SQL statements that are stored in the ODBC Module directory (default: %OmniFi Home%\Reporting module\odbc\modules).
First select a DSN in the dropdown and then what statement to run against the DSN. Depending on permissions and configurations there will be different statements available for the DSN.
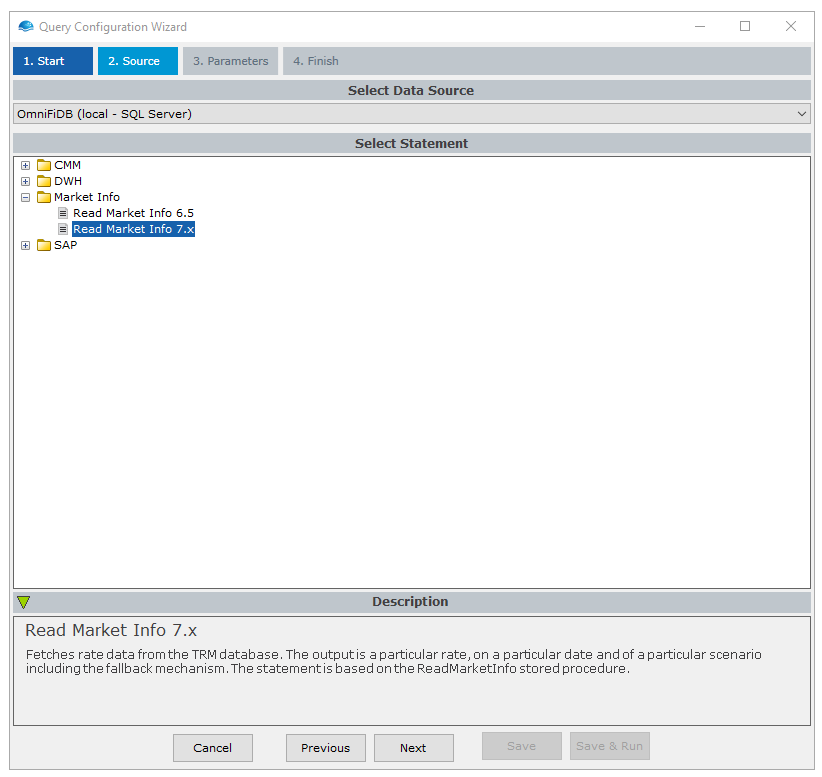
Selecting a statement file
Step 3 : Set Statement Parameters
After selecting the statement then you will need to fill in the parameters. Mandatory parameters are highlighted in red while optional ones are in black.
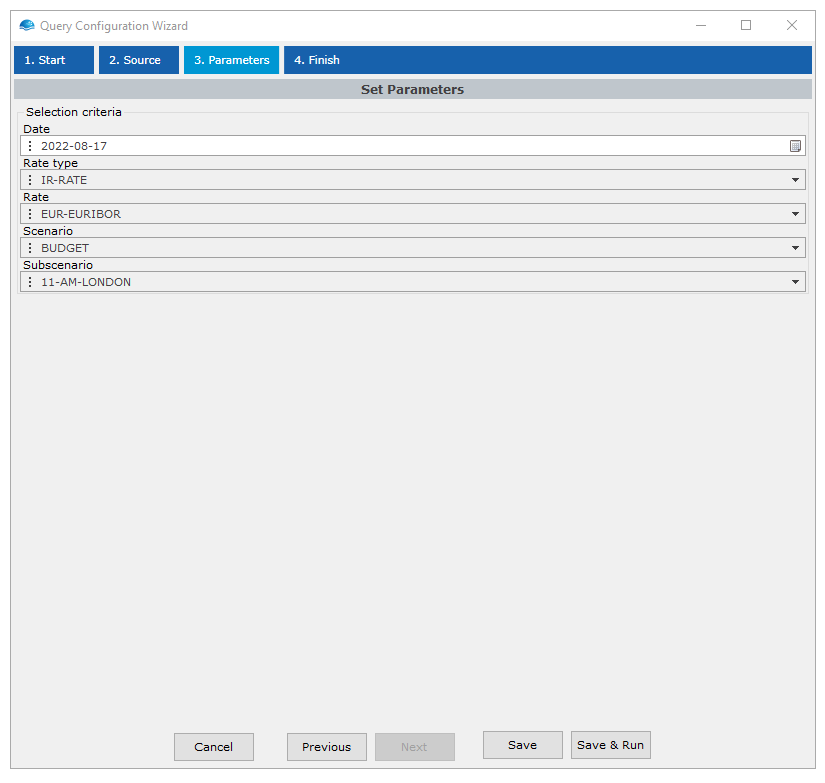
Step 4: Finalizing the Query
Choose Save to save the query without running it, or Save & Run to save and execute the query. If query output is defined then you will see your output in Excel.
Updated 9 months ago