General Toolbox functionality
The Toolbox holds all the nodes available to use in a Workflow. Nodes may be out-of-the-box functionality, Task Executions, Report Executions or built using OmniFi Extensibility. This is a list of the most commonly used nodes.
If
The If node directs the Workflow based on the Boolean (True/False) parameter Condition. If Condition resolves to True, the execution flow will continue from the True port. If False, the execution flow will continue from the False port.
Aside from branching and conditional execution, the If node is also useful to create loops.
Wait
The Wait node pauses the Workflow for the configured duration before continuing. Parameter Duration takes a time expressed as number of days, hours, minutes and/or seconds.
Fail
The Fail node may be used as the last step in a Workflow. A Workflow that ends in the Fail node will result in status Failed, even if all previous steps ended with status Finished (success).
The Fail node supports supports a Result Message parameter, that controls the Result Message field in the History tab. This allows you as a workflow designer to specific fail context to the user, for example a file required for execution couldn't be downloaded.
Stop
The Stop node may be used as the last step in a Workflow. A Workflow without any next step will stop by default. Using a Stop node is completely optional, but recommended to make large, complex workflows, where a single disconnected outgoing port can easily be overlooked, more readable.
Copy File
The Copy File node copies a file and provides the copy with a name of choice. Using expression to set the name allows for flexible naming capabilities.
Note
A Note is a background section that may enhance the visual aspect of the Workflow design, and logically organize complex workflows into logical blocks.
Hovering with the mouse over the Note reveals its menu where it is possible to perform actions on the Note, for example edit, copy, delete or lock. Locking prevents modifications and prevents it from being possible to move through drag-and-drop. This allows for easier navigation on the Design page when using the mouse to click-and-drag in the Design window.
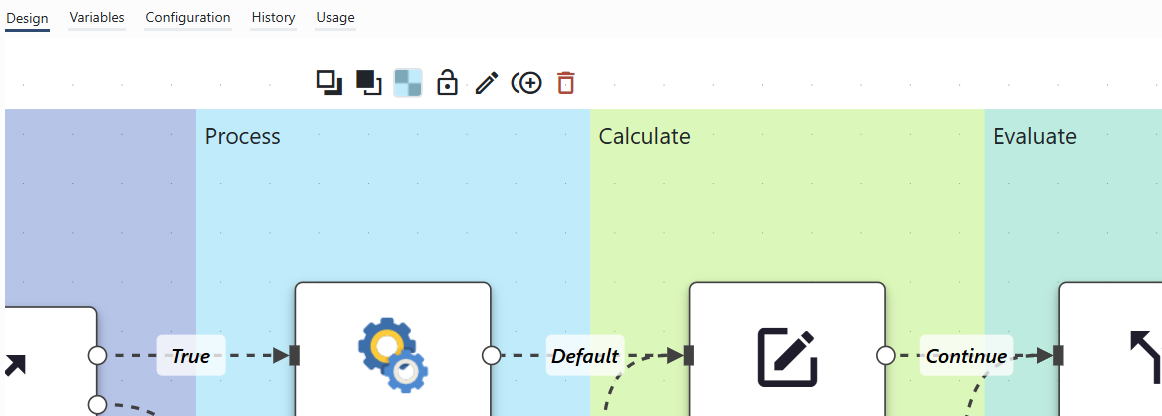
Picture showing a set of Workflow nodes where four Note nodes have been used to create colored and descriptive sections, thereby classifying the roles and purposes of the other nodes placed on top. The menu bar of the blue Note is visible above it.
Read Cells
The Read Cells node reads the contents of cell(s) in a provided workbook.
Parameter Workbook takes input of type File, for example the Result (Excel Book) output from a Report execution or Task iteration. Parameter Cells takes a list of Cell References. A Cell Reference is entered on the form Sheet!Cell, e.g. "Sheet1!A1".
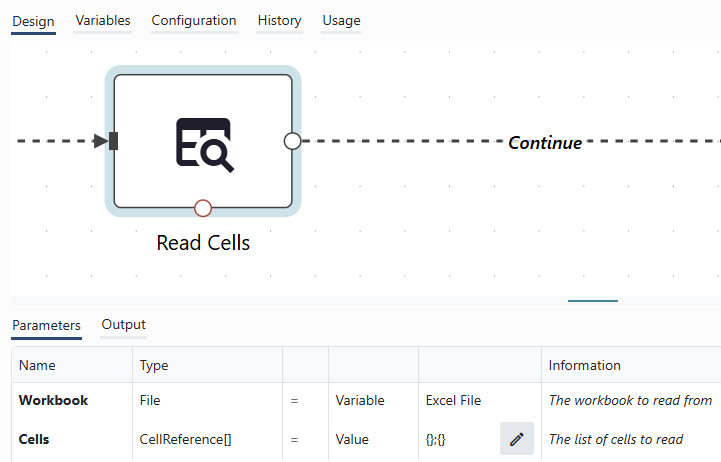
Parameter Workbook inputs the value of variable "Excel File". This variable contains the Result File from a previous Report Execution. The button with the symbol of a pen opens the Cells Configuration window where one configures which workbook cells to read data from.
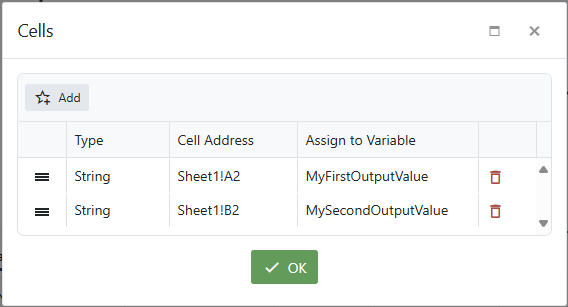
Cell Configuration window. The values of the two cells Sheet1!A2 and Sheet1!B2 will be saved to the variables MyFirstOutputValue and MySecondOutputValue upon node execution.
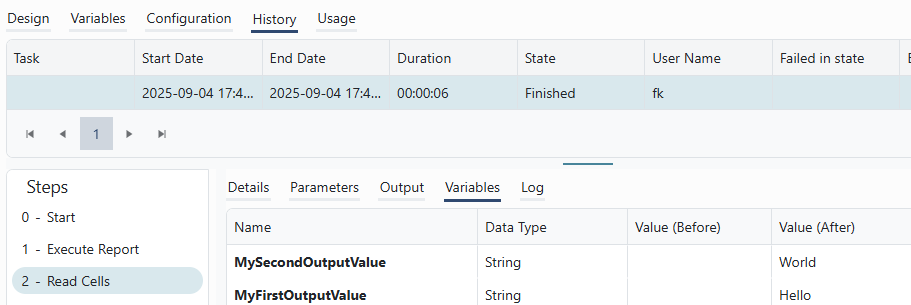
The values held by the variables may be viewed in the History tab under the Variables section. In the picture, we see that the values held by variables MyFirstOutputValue and MySecondOutputvalue changed from null to "Hello" and "World" on Step 2.
Send Mail
The Send Mail node sends an e-mail to a number of recipients, containing the desired body, attachments etc.
Parameter Mail body is of Type Html. The mail body may be designed in the Mail Body HTML Editor, either by writing HTML code or by using available configuration buttons.
It is also possible to populate the editor with HTML code by uploading a .html or .docx file using the Upload button. The code of the uploaded file may be displayed and edited in the editor, thereby making it possible to use the editor for complementary modifications.
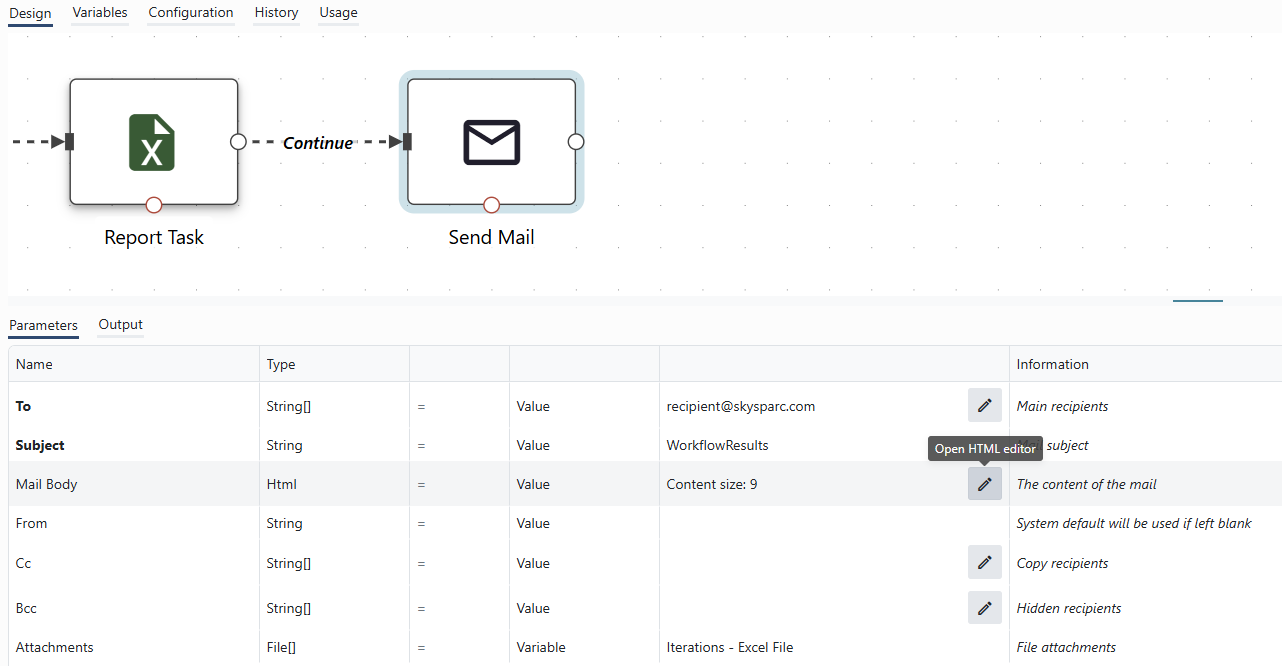
Example of a Send Mail node execution. The "Open HTML editor" button of the parameter Mail Body is highligted. Parameter Attachments takes a variable as input where the variable holds the output of a Report Task execution, which is a list of Result files from each of the task's iterations.
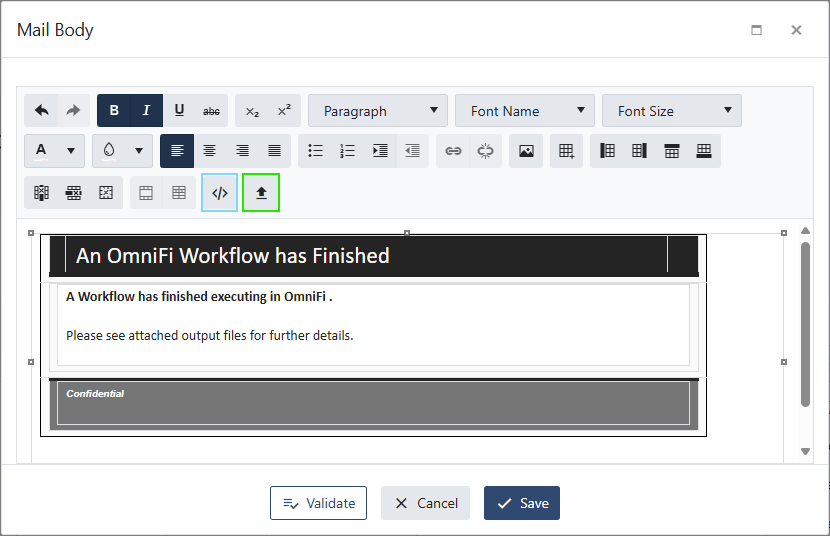
Screenshot of the opened HTML Editor of the Mail Body parameter, showing the replay of HTML code. Uploading a file containing HTML code may be done using the Upload button, highlighted in green. Switching from the replay of the HTML code to seeing the code may be done using the Switch button, highlighted in blue.
Variables are referenced using the same
$Variable Name$-notation used in expressions.Numbers and dates are formatted according to the system locale. If you need more control over formatting, format scalar values to string using expressions.
Array variables up to 2 dimensions are formatted to tables in the HTML layout. A 1D array is formatted as a column, and a 2D array is formatted as multiple columns with rows.
Set Variables
The Set Variables node is used to populate variables during the Workflow runtime.
Variables may be populated in four ways: from using the Set Variables node, from other nodes' output, as default values or as Workflow Start Arguments.
The Set Variables node allows you to set variable values throughout the execution of the workflow.
- You can set any number of variable operations in a single node.
- Operations are run in the order they appear, and you can sort the operations by dragging them into order.
- You can set the same variable multiple times in the same Set Variables node
- You can use expressions to calculate variable values.
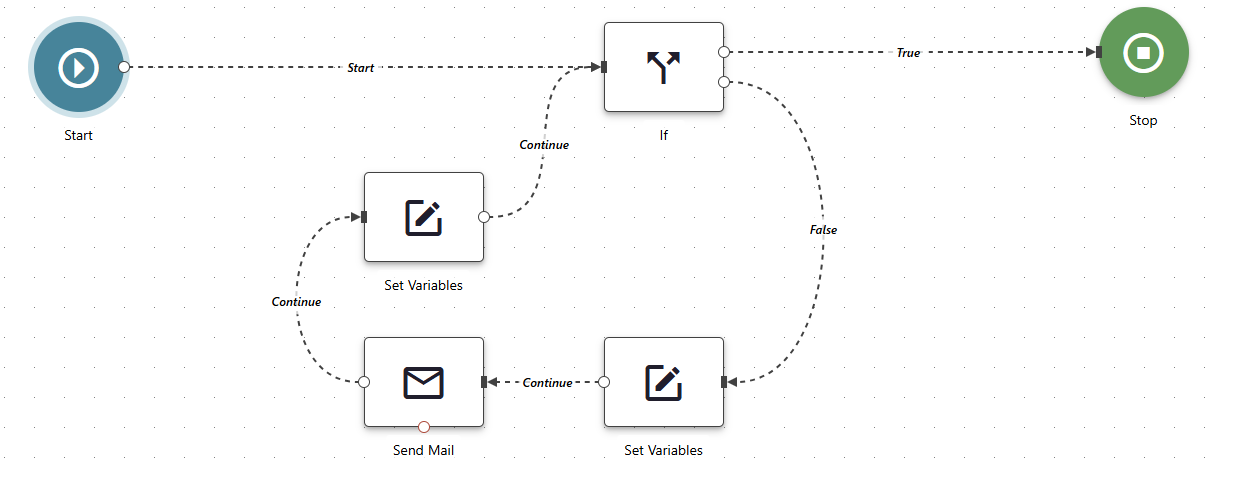
Combined with the If node, the Set Variables node allows advanced calculations and evaluations to be made as part of the Workflow Design.
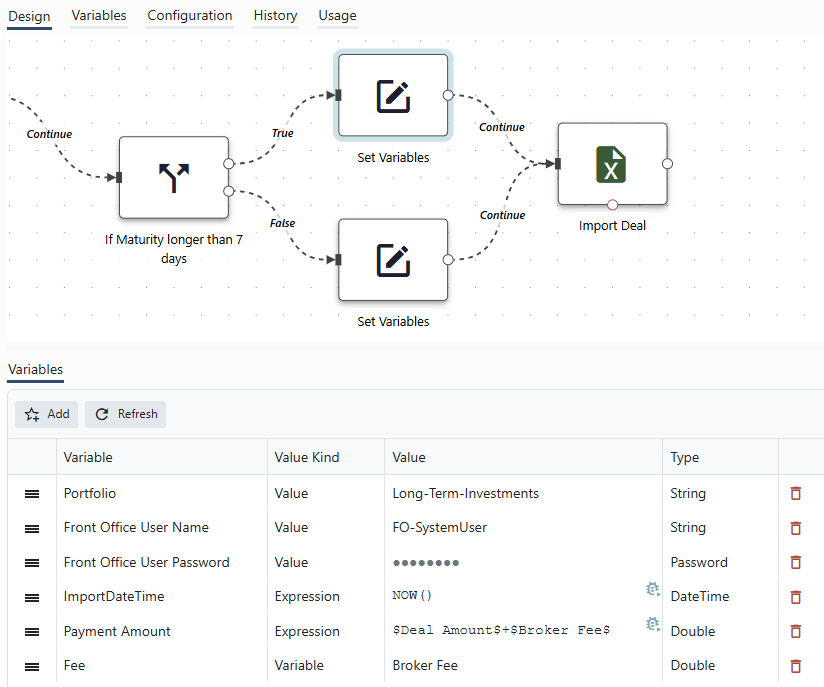
Example of a Workflow that imports a deal. The Set Variables nodes are used to set variables based on the conclusion of the If node in the previous step. The If node evaluates if the Maturity of the deal to be imported is longer than 7 days. If the node resolves to True, the Portfolio will be set to "Long-Term-Investments", which would contrast the Portfolio set if the False path would have been followed. Five additional variables are also set: user name, password and import time stamp are provided as values on the node. Payment Amount and Fee are populated based on previously known variable values.
Updated 9 months ago